I've come to Statiq after setting up a number of sites on WYAM - and loving the process! My setup is Azure DevOps for the code, and I am hosting for free on Netlify.
After setting up a new Statiq site, I wanted to upload to Netlify when I checked into files to GIT on Azure DevOps.
There are now a couple of ways to do this, one of which is built into Statiq.
New Method
Inside the Statiq Bootstrapper, we now have a DeployToNetlify extension method, which does exactly what it describes. It requires two parameters - one for the site on Netlify and one for Netlify in general.
public static async Task<int> Main(string[] args)
{
    return await Bootstrapper
        .Factory
        .CreateWeb(args)
        .DeployToNetlify
        (
            Environment.GetEnvironmentVariable("NETLIFYSITEID", EnvironmentVariableTarget.Process),
            Environment.GetEnvironmentVariable("NETLIFYACCESSTOKEN", EnvironmentVariableTarget.Process)
        )
        .RunAsync();
}
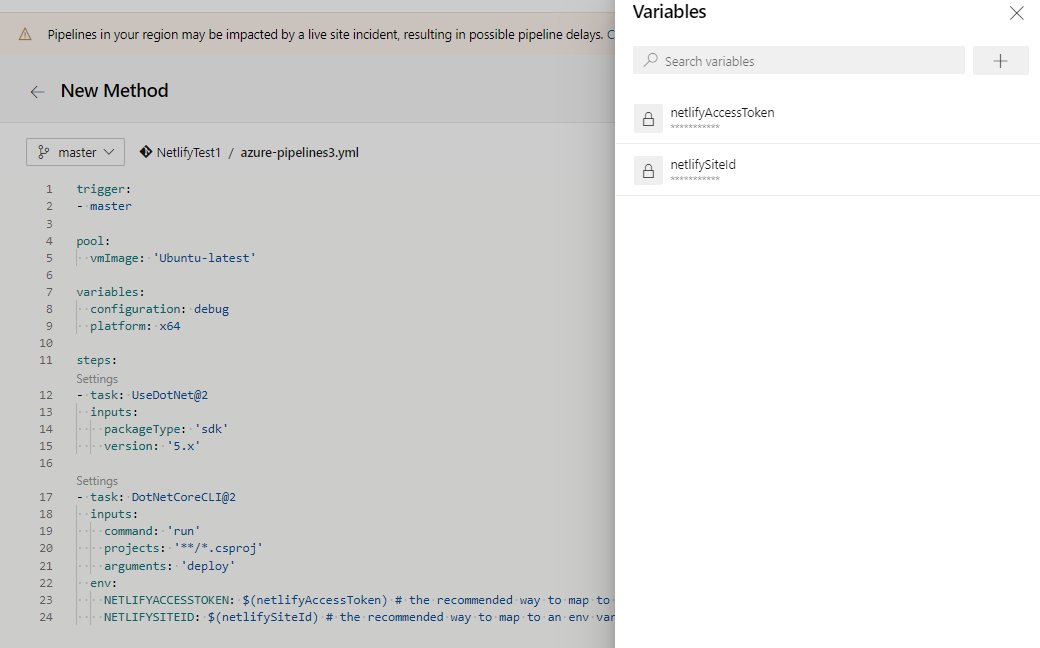
To use this, we need to create a new Pipeline inside Azure DevOps, and use the following code:
trigger:
- master

pool:
  vmImage: 'Ubuntu-latest'

variables:
  configuration: debug
  platform: x64

steps:
- task: UseDotNet@2
  inputs:
    packageType: 'sdk'
    version: '5.x'

- task: DotNetCoreCLI@2
  inputs:
    command: 'run'
    projects: '**/*.csproj'
    arguments: 'deploy'
  env:
    NETLIFYACCESSTOKEN: $(netlifyAccessToken) # the recommended way to map to an _env_ variable
    NETLIFYSITEID: $(netlifySiteId) # the recommended way to map to an _env_ variable
What the above says is when anything is committed to the master branch, spin up a new Ubuntu VM, using .net Core 5, run the code with the arguement 'deploy' which then hooks into 'DeployToNetlify' from above and will deploy the code.
The code contains two environment variables: NETLIFYSITEID & NETLIFYACCESSTOKEN.
As we do not want to store these in plain text, we will store them as secrets so no one else can view them. The special part of this is to have the 'env' section at the bottom which reads our secret variables from DevOps and places them inside a variable to use inside the pipeline. The Bootstrapper can then pick them up.
When we check in a file into the Master this will all work automatically and publish to my Netlify site.
Old Method
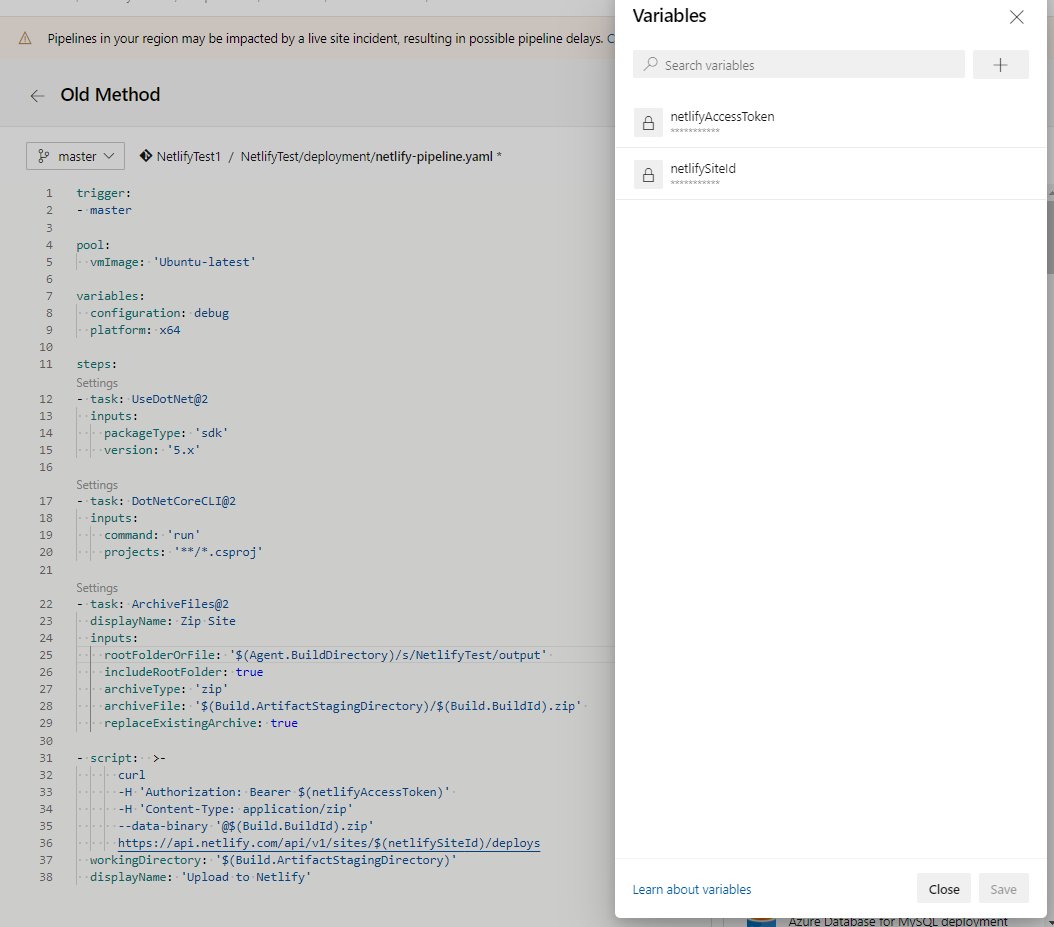
As I had already setup a Pipeline to work with WYAM before and publish to Netlify, this is also an option to use with Statiq - although it did take me a little while to work out what differences were needed.
trigger:
- master

pool:
  vmImage: 'Ubuntu-latest'

variables:
  configuration: debug
  platform: x64

steps:
- task: UseDotNet@2
  inputs:
    packageType: 'sdk'
    version: '5.x'

- task: DotNetCoreCLI@2
  inputs:
    command: 'run'
    projects: '**/*.csproj'

- task: ArchiveFiles@2
  displayName: Zip Site
  inputs:
    rootFolderOrFile: '$(Agent.BuildDirectory)/s/NetlifyTest/output'
    includeRootFolder: true
    archiveType: 'zip'
    archiveFile: '$(Build.ArtifactStagingDirectory)/$(Build.BuildId).zip'
    replaceExistingArchive: true

- script:  >-
      curl
      -H 'Authorization: Bearer $(netlifyAccessToken)'
      -H 'Content-Type: application/zip'
      --data-binary '@$(Build.BuildId).zip'
      https://api.netlify.com/api/v1/sites/$(netlifySiteId)/deploys
  workingDirectory: '$(Build.ArtifactStagingDirectory)'
  displayName: 'Upload to _Netlify_'
Again, the above code block is triggered on a commit to Master, uses the latest Ubuntu image and uses .net Core 5, run the code, but this time there is no deploy arguement specified. What we then do is Zip the files up from the output folder and using the Netlify API upload those files to the site. Again this method uses the same two variables inside the pipeline.
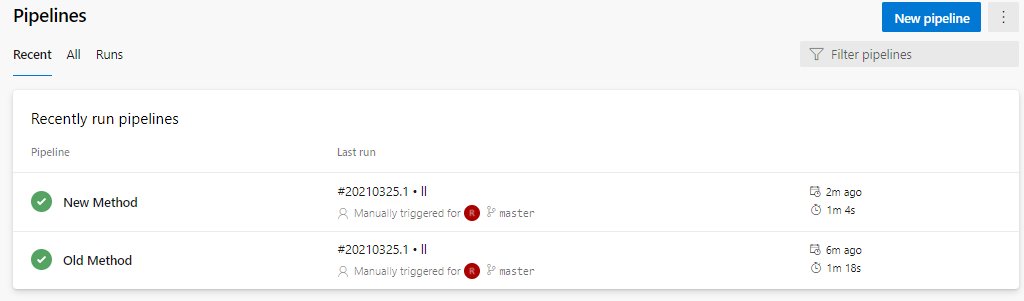
Differences in time
This is only a small Web App to test and has two content items, but for a comparison, the old method takes 78 seconds, and the new method took 64 seconds. To be honest this could be to do with Azure free pipelines, but there really isn't much in it. And there shouldn't be. The old method does give you more options to do extra build steps if you need to do something else.
Improvements
In the old method, you have to manually change the '/NetlifyTest/' folder, which is the name of my project. I would like to change this so it works regardless of the project name, but I can live with it.
rootFolderOrFile: '$(Agent.BuildDirectory)/s/NetlifyTest/output'
This works so well for me. All I need to do is check in a new content item to my project, and Azure DevOps takes over to build and publish the site meaning I don't have to. Saves me having to remember!