This is the first in a multi-part series regarding static content generated websites and hosting a basic website.
Introduction
My previous setup for this blog was a Wordpress website. Whilst it worked, it was a complete overkill for what I needed. I was spending too much time keeping it updated. This site is a simple blog. There is no need for all the extendability that Wordpress brings.
I've also been spending more time on Azure and had seen a few people talk about using Azure Blob Storage to host static websites for a fraction of the cost of PHP/MySQL hosted sites. Which sounded like a great way to cut costs.
I'd come across the WYAM Static Content Generator through a few sources, and this is the path I chose to investigate. Static site generators are not new. WYAM is built on .net, and being a .net Developer seemed like a good fit for my first foree into this new world. WYAM describes itself as:
It's a static content toolkit and can be used to generate web sites, produce documentation, create ebooks, and much more. Since everything is configured by chaining together flexible modules (that you can even write yourself), the only limits to what it can create are your imagination.
Setup
WYAM comes with a Blog receipe to keep things simple, so getting a site up and running took no time at all.
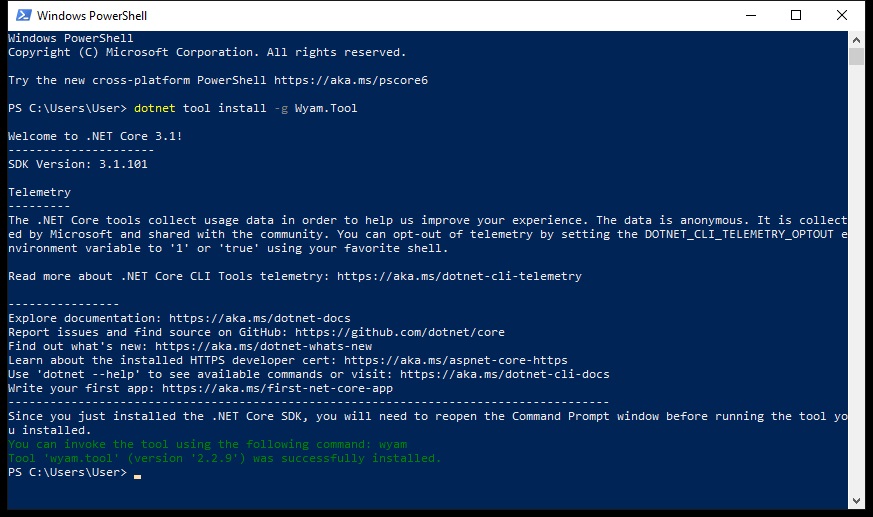
To start this process, open up a Powershell Prompt, and type the following to install:
dotnet tool install -g Wyam.Tool
Once that has finished, hopefully you got the success message.
Next, navigate to the folder you want to put the WYAM files for your new website. For this example, I've put it on the Desktop for simplicity.
cd c:\users\user\desktop\WYAM
Scaffold the WYAM files with the Blog recipe to generate the templated files:
wyam new --recipe Blog

Build the Blog to get the output.
wyam --recipe Blog --theme CleanBlog

You've then got the basic site to work with.
Build and Run
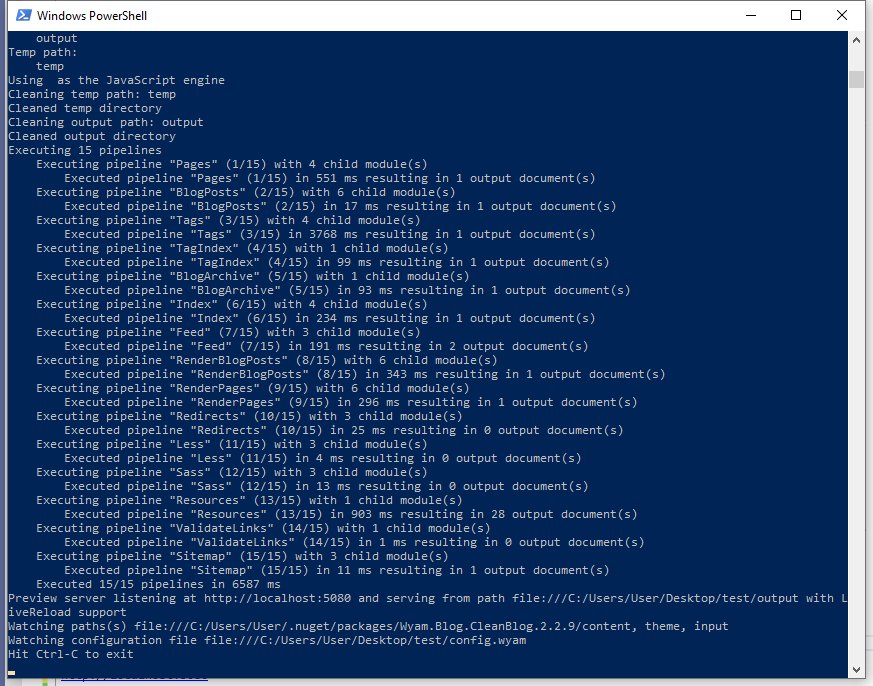
We can test this out by utilising the built in Web Server with Auto-Reload. Reopen Powershell in the directory your site is in, and type the following:
wyam -w -p
Once that has finished building it should show the following:
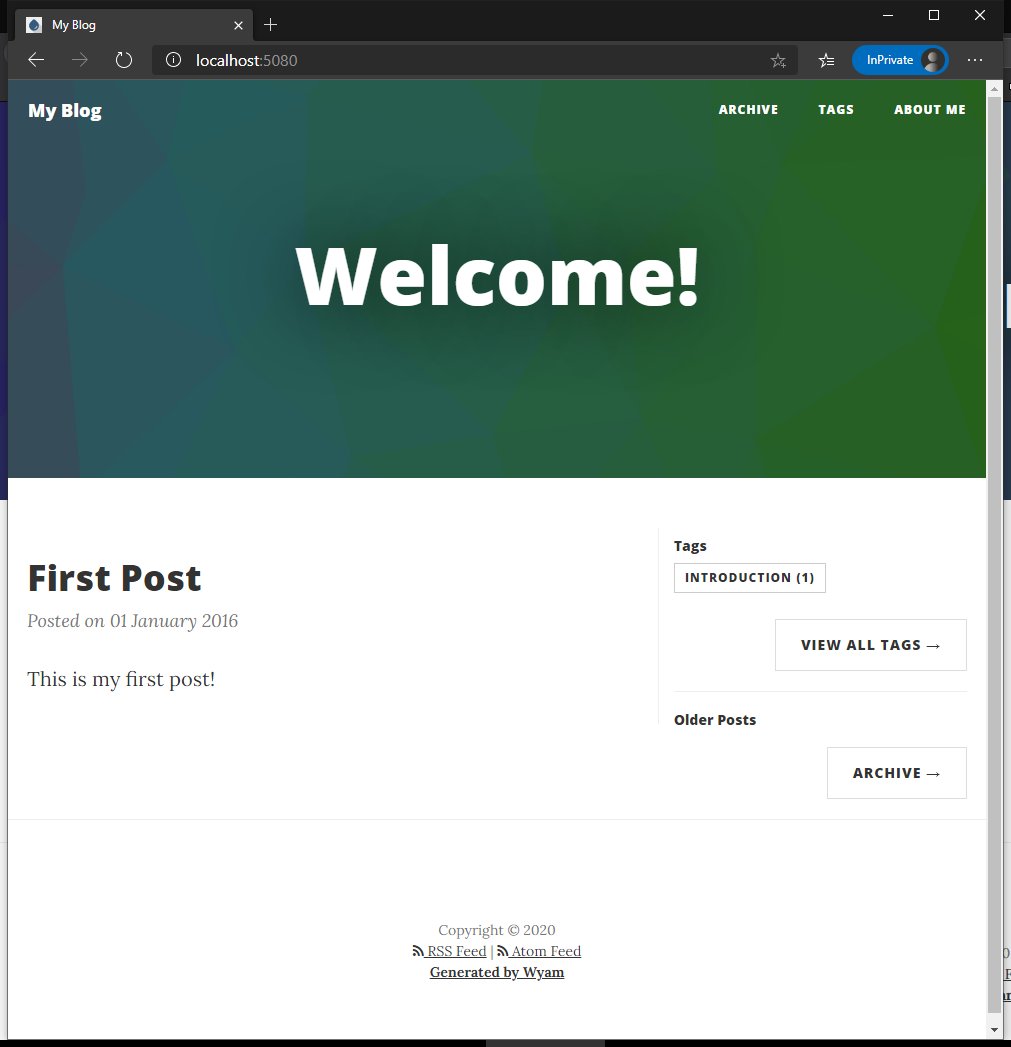
As you can see, if we open the URL in the Powershell output window (http://localhost:5080) we can see the site.
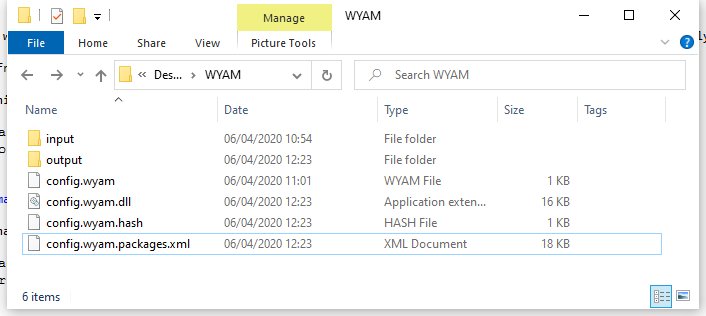
You should then be able to look inside your WYAM folder and see the files generated in the input folder for the basic site, and also the Output folder which gets generated when you build the site.
Customisation
Now we can start adding posts and modifying the layout to how we want it.
Click this page to shows the config options for the config.wyam file. This needs to be altered before you release.
For example, my config looks like this:
#recipe Blog

1. System.Globalization.CultureInfo.DefaultThreadCurrentCulture = System.Globalization.CultureInfo.CreateSpecificCulture("en-GB");

2. Settings[Keys.Host] = "www.tryingtocode.co.uk";
3. Settings[Keys.LinksUseHttps] = true;
4. Settings[Keys.LinkHideExtensions] = false;

5. Settings[BlogKeys.Title] = "TryingToCode";
6. Settings[BlogKeys.Description] = "Just another developer...";
7. Settings[BlogKeys.IncludeDateInPostPath] = true;
8. Settings[BlogKeys.IndexPageSize] = 5;
9. Settings[BlogKeys.IndexPaging] = true;
10. Settings[BlogKeys.MetaRefreshRedirects] = true;
11. Settings[BlogKeys.Image] = "assets/images/keyboard50.jpg";
Going through line by line.
- This specified the date in UK format which is what I wanted.
- Specifies the URL of your site. Affects links in the site, RSS and SiteMap.
- Forces the site links to be HTTPS.
- You can show/hide .html extensions on your URLs.
- Top title of the site.
- Welcome description.
- Do you want the date on the posts?
- How many blogs per page.
- Do you want blog paging on?
- This is used for redirecting from old blog posts (more on this later)
- Override the default page image.
Next up, inside the Input folder, we can see the about.md file, and a folder called posts, which contains a file called first-post.md. Inside the posts folder is where you will put your new posts. Other markdown file you put inside the root location will appear as links in the top navigation bar.
As you can see from the first blog post, the WYAM md files take the format:
Title: First Post
Published: 1/1/2016
Tags: Introduction
---
This is my first post!